Object Detection Tutorial
Create a custom YOLO-Pro model for your FIRST robot in 10 steps.
Prerequisites
- Access to FIRST Robotics Edge Impulse
- Enough images from your robot's camera—50–100 is often enough, but you may need more depending on what you're trying to detect
- Camera mounted in competition position
Step 1: Create Your Project
- Go to firstrobotics.edgeimpulse.com
- Create an account on the login page or sign in if you already have an account
- Click Create new project
- Name it (e.g., "2025-Game-Piece-Detection")
- Click Create project
Step 2: Create your AI Model
Follow steps 2-4 from the Edge Impulse Object Detection Docs with these important modifications:
During Step 3 - Designing an Impulse:
- Use your camera mounted on your robot
- Set width and height to 640x640 (required for PhotonVision)
During Step 4 - Configuring the Transfer Learning Model:
- Change AI Model to YOLO-Pro
- Change Training Processor to GPU
- Your configuration should look like:
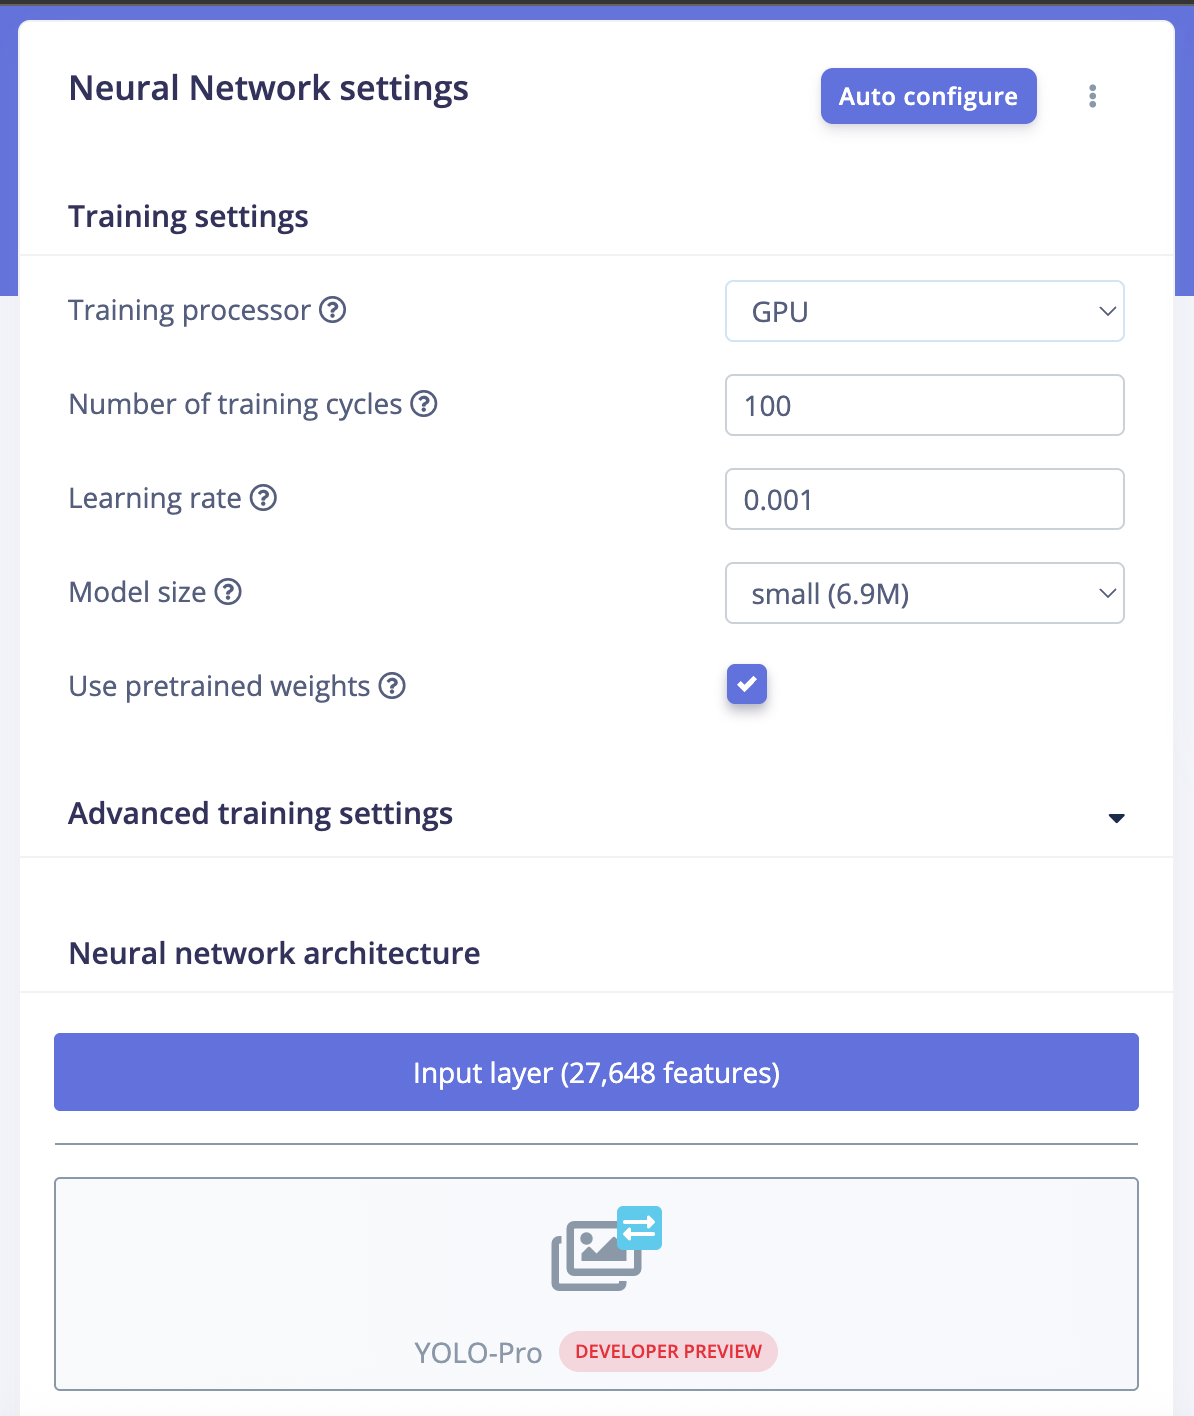
- Change the model size to tradeoff performance with accuracy
- Nano is our recommendation for most teams
Step 3: Download Model
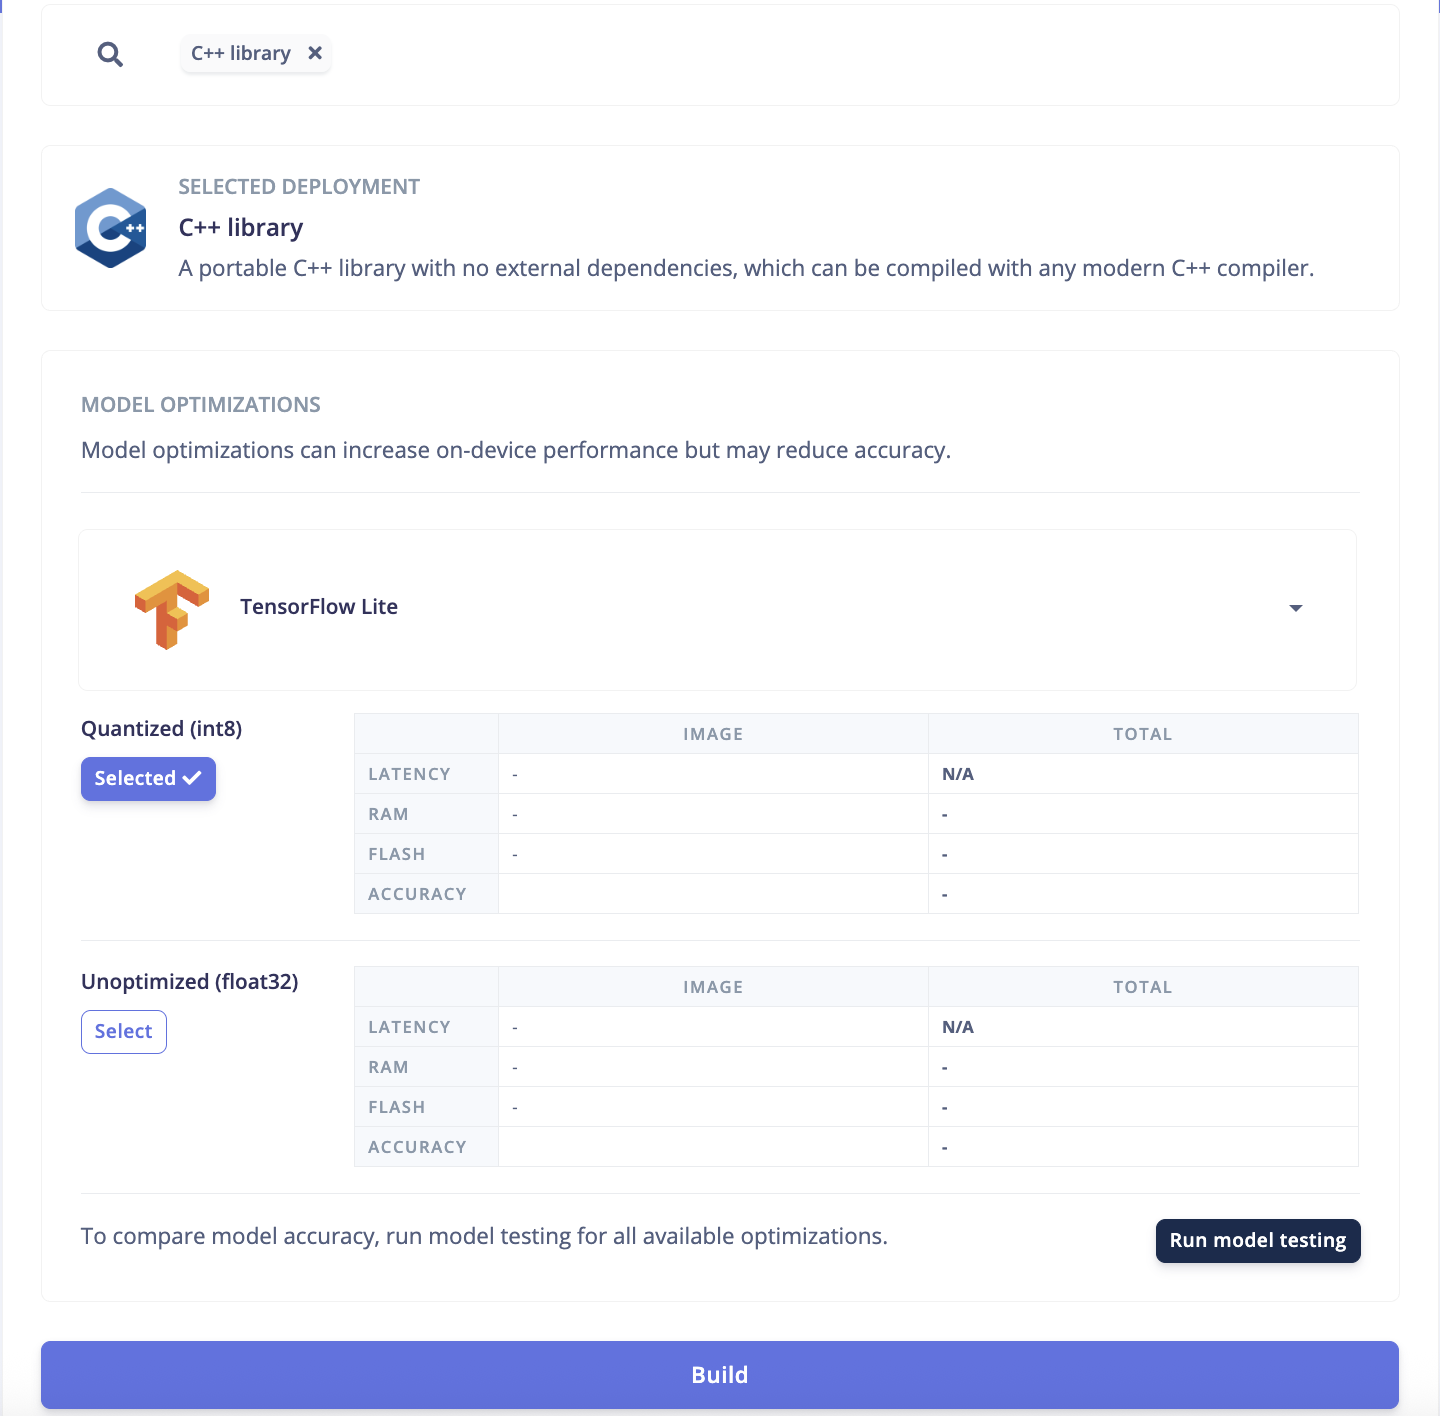
- Go to the Deployment tab
- Select C++ Library
- Select Tensorflow
- Select Quantized Int8
- Click Build
Your configuration should look like this:
Step 4: Deploy to Robot
note
PhotonVision to update how they want the deployment to work. We'll update this section when we know more.
Step 5: Iterate & Improve
Machine learning is iterative. Your first model is just the beginning!
Next Steps
Congratulations! You've created your first custom object detection model.
Continue learning:
- Read Best Practices for advanced tips
- Talk with others on Chief Delphi!
Remember
The best models come from continuous iteration. Each competition provides valuable data for improvement. Good luck!